
The validation process of all certificates that you issue (on all our plans) takes place, by default, inside the website from Virtualbadge.io. The validation process can verify the recipient information associated with each certificate and check if the certificate is still valid/expired.
Use the link here to validate and verify your credentials.
If you have questions about building the content on the validation page itself, refer to this document.
How to verify certificates on your website?
The validation process of the certificates can take place on a page of your choice, on your website’s domain. This is done in the format of an iframe, and can be easily implemented using custom code.
You can find the code for your validation by visiting the tab “Manage Organisation” → “Integrations” and clicking on the instructions for the Certificate Validator.

Simply follow the instructions from there on. The first code snippet should be directly implemented into the iFrame like in this example:

And the second part of the Code should be implemented into the body section of your validation page like this:

Once you have added the iframe code to the chosen page of your website, just reach out to us via chat and ask for the validation path to be changed. You can also reach out directly via email to contact@virtualbadge.io.
To ensure that your validation page remains private and cannot be indexed or found via search engines after a recipient’s credential is validated or activated, please disable search engine indexing when setting up this page.
Troubleshooting private label validation
What should you do if the validation pages are not performing as expected? Here are a few tips:
- Double-check the code that you added to your website
Seems like a small thing, but adding one extra space can change the entire code (and break it). Delete the code that you added to your website and add it again. - Clear your cache and delete cookies
This is practical after you have just refreshed your iframe code. Sometimes, the local memory of your computer can store images/old codes that are not up to date.
If you are using Chrome on Windows, you can easily clear your cache by right-clicking with your mouse → Choosing “Inspect” → Selecting the refresh button on the top left corner of the browser → Choosing “Clear cache and hard reload”.

WordPress websites
If you host your website on WordPress, there is an official plugin created by us for this occasion. You can find this plugin here or by searching for "Virtualbadge.io" in the Wordpress plugin library. Simply install this Plugin and follow along this guide to set up your own validation page:
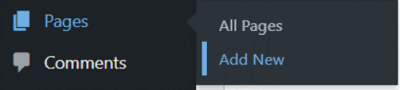
- Create a new default page by hovering over “Pages” in the left-hand menu bar and then clicking “Add New”.
 Go to the “List View” and remove all the unnecessary blocks.
![]()
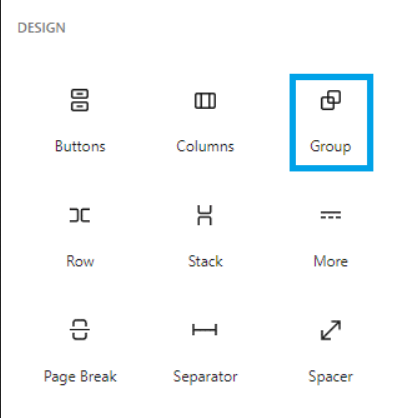
3. Click on the blue plus button to add a new block and choose “Group” which you will find in the design category.
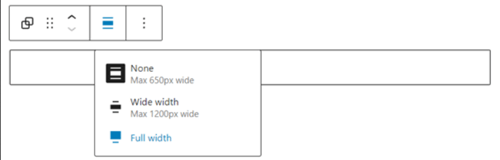
4. Select the group on your page and change the alignment to full width.
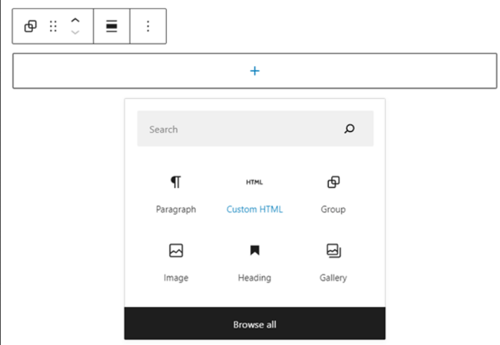
5. Click on the group one more time to receive options on what to insert into the group. There you need to choose “Custom HTML”.
6. Select the Custom HTML block and insert the code ( [VBCertValidator] ) into the input field.

7. That’s it! Now you can enjoy the certificate validation page in your own WordPress website.
Other FAQs
- What happens to the certificates issued before the validation page was implemented on my website?
Only new certificates will be verified in your domain. This means that if you have issued certificates before settings the validation path on your domain as test certificates, their validation will still take place inside Virtualbadge.io’s website.
The same will have in case you have upgraded from a Pro/Starter subscription and you have already issued certificates previously.
If you wish to change the validation path from previously issued certificates to your domain, these certificates must be reissued by your recipients. Our support team can help you prepare the email and will share the best practices with you, directly from the software chat.
- What happens to the validation page in case I cancel/downgrade my subscription to a plan that does not include private label validation?
Once your subscription is canceled or downgraded, the validation page of your certificates will switch to the default validation page on Virtualbadge.io’s website.
This implies that the validation path that your recipients have for their domain is not valid anymore.
There are 2 different ways to proceed in case you want to guarantee the best experience for your recipients:
- Communicate to your recipients that the new validation page is https://www.virtualbadge.io/certificate-validator. They will be able to validate their certificates using the same certificate ID.
- Ask us about pure hosting plans. These plans are interesting in case you do not wish to issue new certificates, but you would still like the current certificates to be verified on your website. You can contact us at contact@virtualbadge.io.
Interested in This Feature? Unsure if this feature belongs to your plan?
Contact us through:
- Email us: contact@virtualbadge.io
- Send us a request here