You can easily customize the logo and color scheme for all new certificates sent from your account. This ensures consistency across your email headers and recipient view pages, while still allowing flexibility for individual certificates.
To update your account’s default logo and color scheme:
-
Navigate to your dashboard and click on 'Organization Settings'.
-
Under the 'Logo' section, click 'Upload' to add your company’s logo.
-
Enter your desired Primary and Secondary color hex codes under the Design section.
-
Click 'Save' to apply the changes.

Don’t forget to save your changes!
Once saved, your logo will appear in the header of all certificate emails, as well as in the navigation bar on the recipient’s view page for new certificates. These settings will apply to all future certificates, but you can still customize them individually for each certificate.
Existing Certificates
Please note that updating your default logo and color settings will not retroactively apply to existing certificates, regardless of their status (Active or Draft). To update these certificates:
-
For logos: Navigate to the certificate's 'Basic Details' tab and upload the new logo.
-
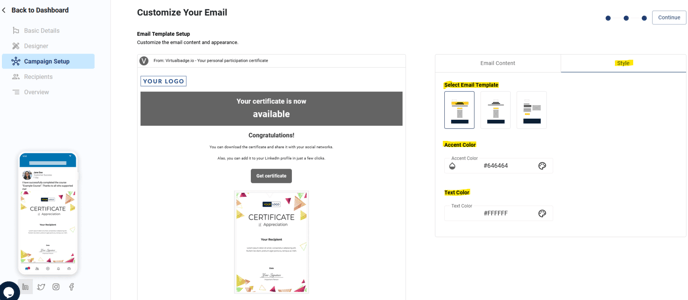
For colors: Go to 'Recipient Experience' → 'Email Template Setup' → 'Style', and manually update the color codes under the 'Email Settings' tab.
Customizing your default logo and colors is simple and ensures a cohesive look for your certificates. While these settings apply to new certificates, you can still make individual adjustments as needed for existing ones.
Summary:
Default logos and color schemes ensure consistent branding for new certificates.
Existing certificates require manual updates for branding changes.
Primary and Secondary colors customize different elements of recipient emails.
FAQs:
Q: Will changing the default logo affect previously issued certificates?
A: No, changes only apply to new certificates. Existing ones must be updated individually.