
Dynamic text fields hold information that can be different for each of your recipients. The most common example is the recipient’s name, but any other information can be dynamic too.
There are two types of dynamic fields:
- Pre-defined dynamic fields: fields Virtualbadge.io provides: Recipient Name, ID Number, Issue Date and Credential Name.
- Custom dynamic fields: fields you create for any other information. You map their content when adding recipients.
How to add Dynamic Text Fields?
Templates from the Virtualbadge.io template gallery include only the Recipient Name dynamic field by default. You’ll need to add any other dynamic fields yourself.
In the Designer, open the Dyn. Content tab in the left-hand menu. It lists all available pre-defined dynamic fields, and you can create custom dynamic fields there too.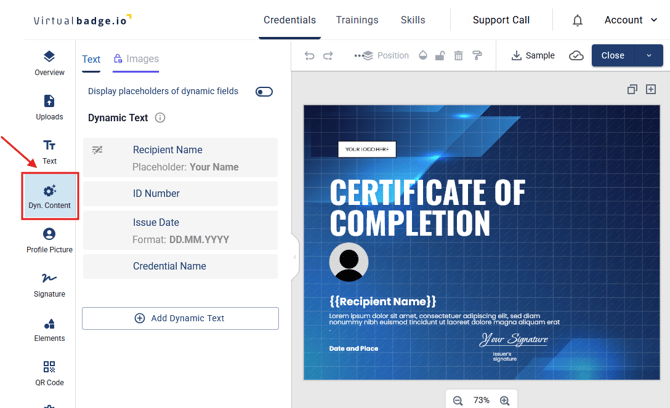
Adding Pre-defined Dynamic Fields
Hover over a pre-defined dynamic field and click the + icon.
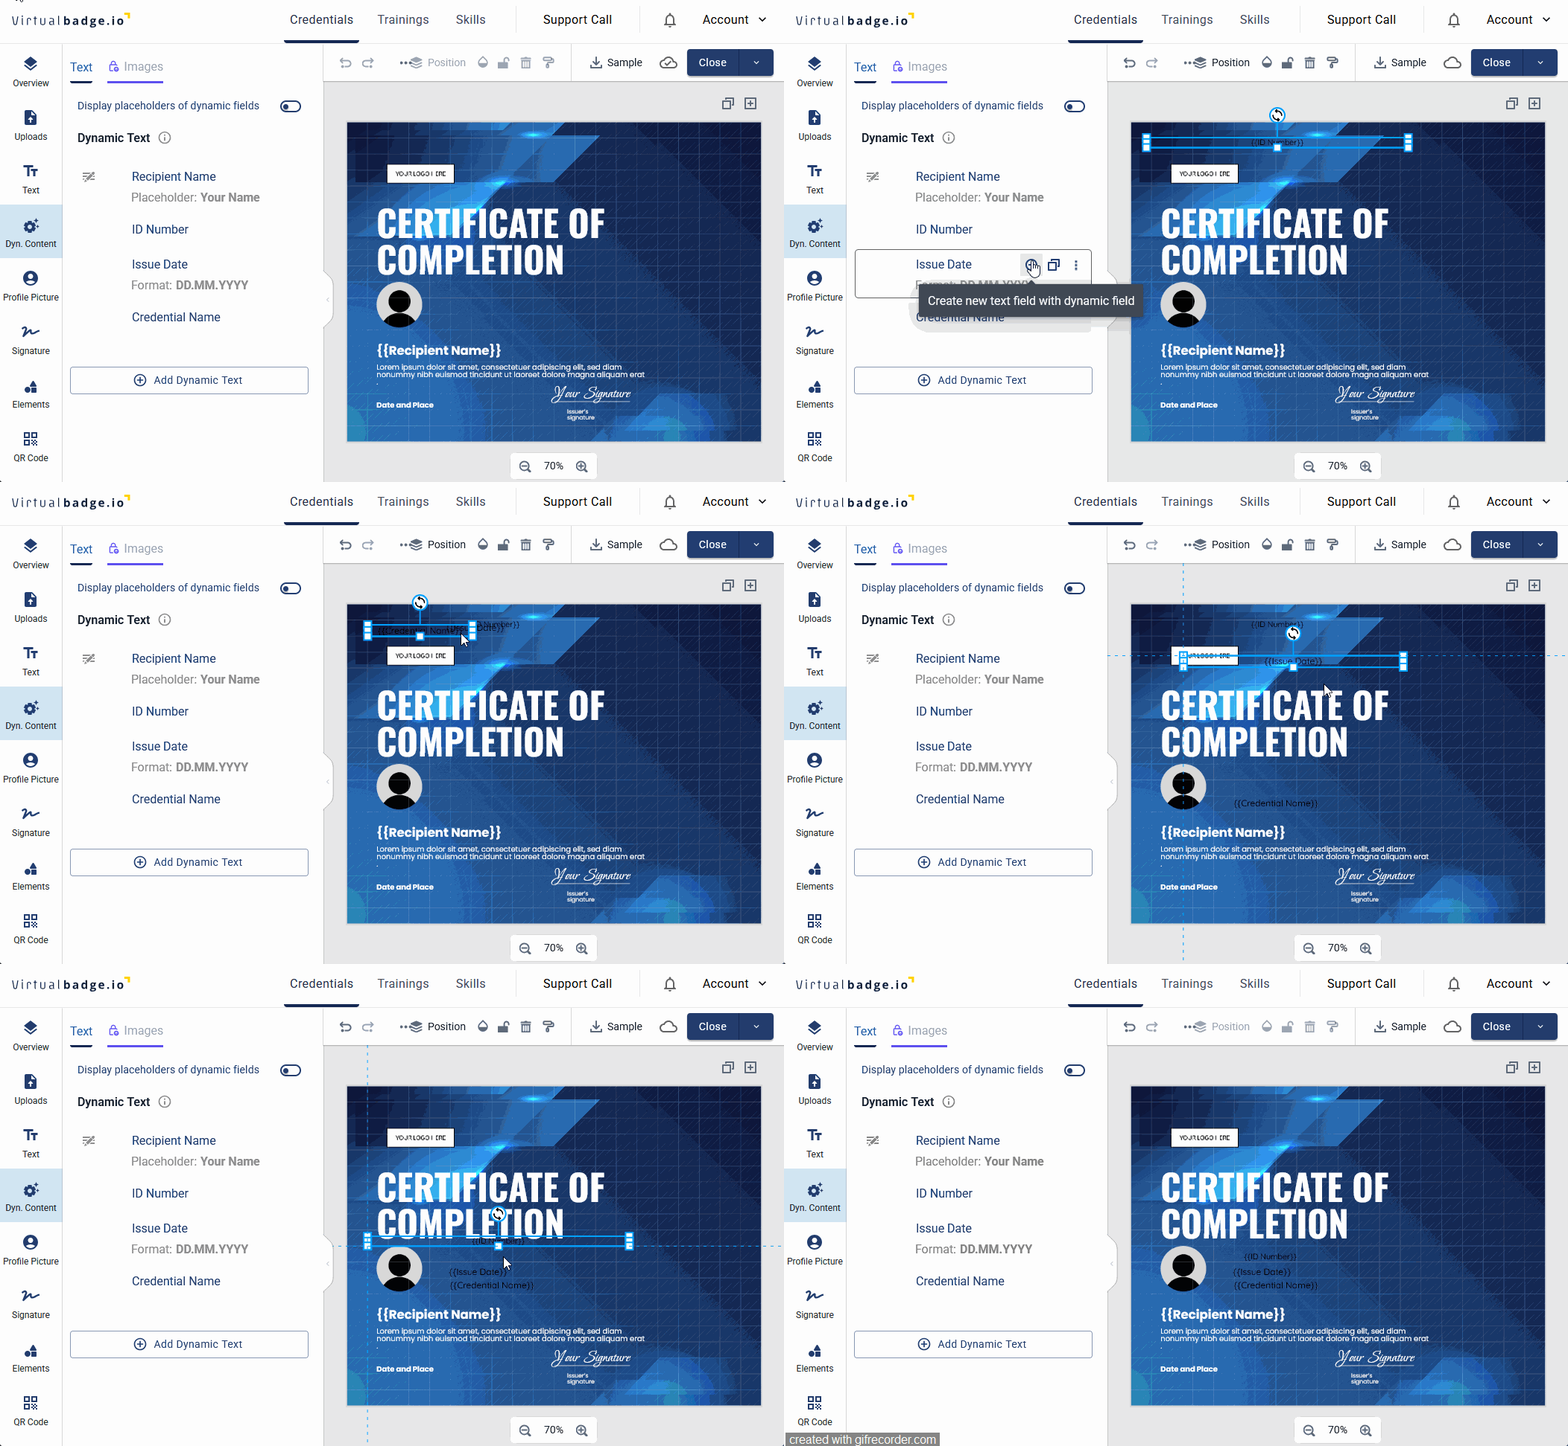
Here’s a quick overview of how each pre-defined dynamic fields work:
- Recipient Name: added through your CSV upload.
- ID Number: generated automatically and can’t be changed through CSV uploads.
- Issue Date: taken from the Basic Details section, but can be updated manually or through a CSV upload.
- Credential Name: taken from the Certificate Name in Basic Details.
Adding custom dynamic fields
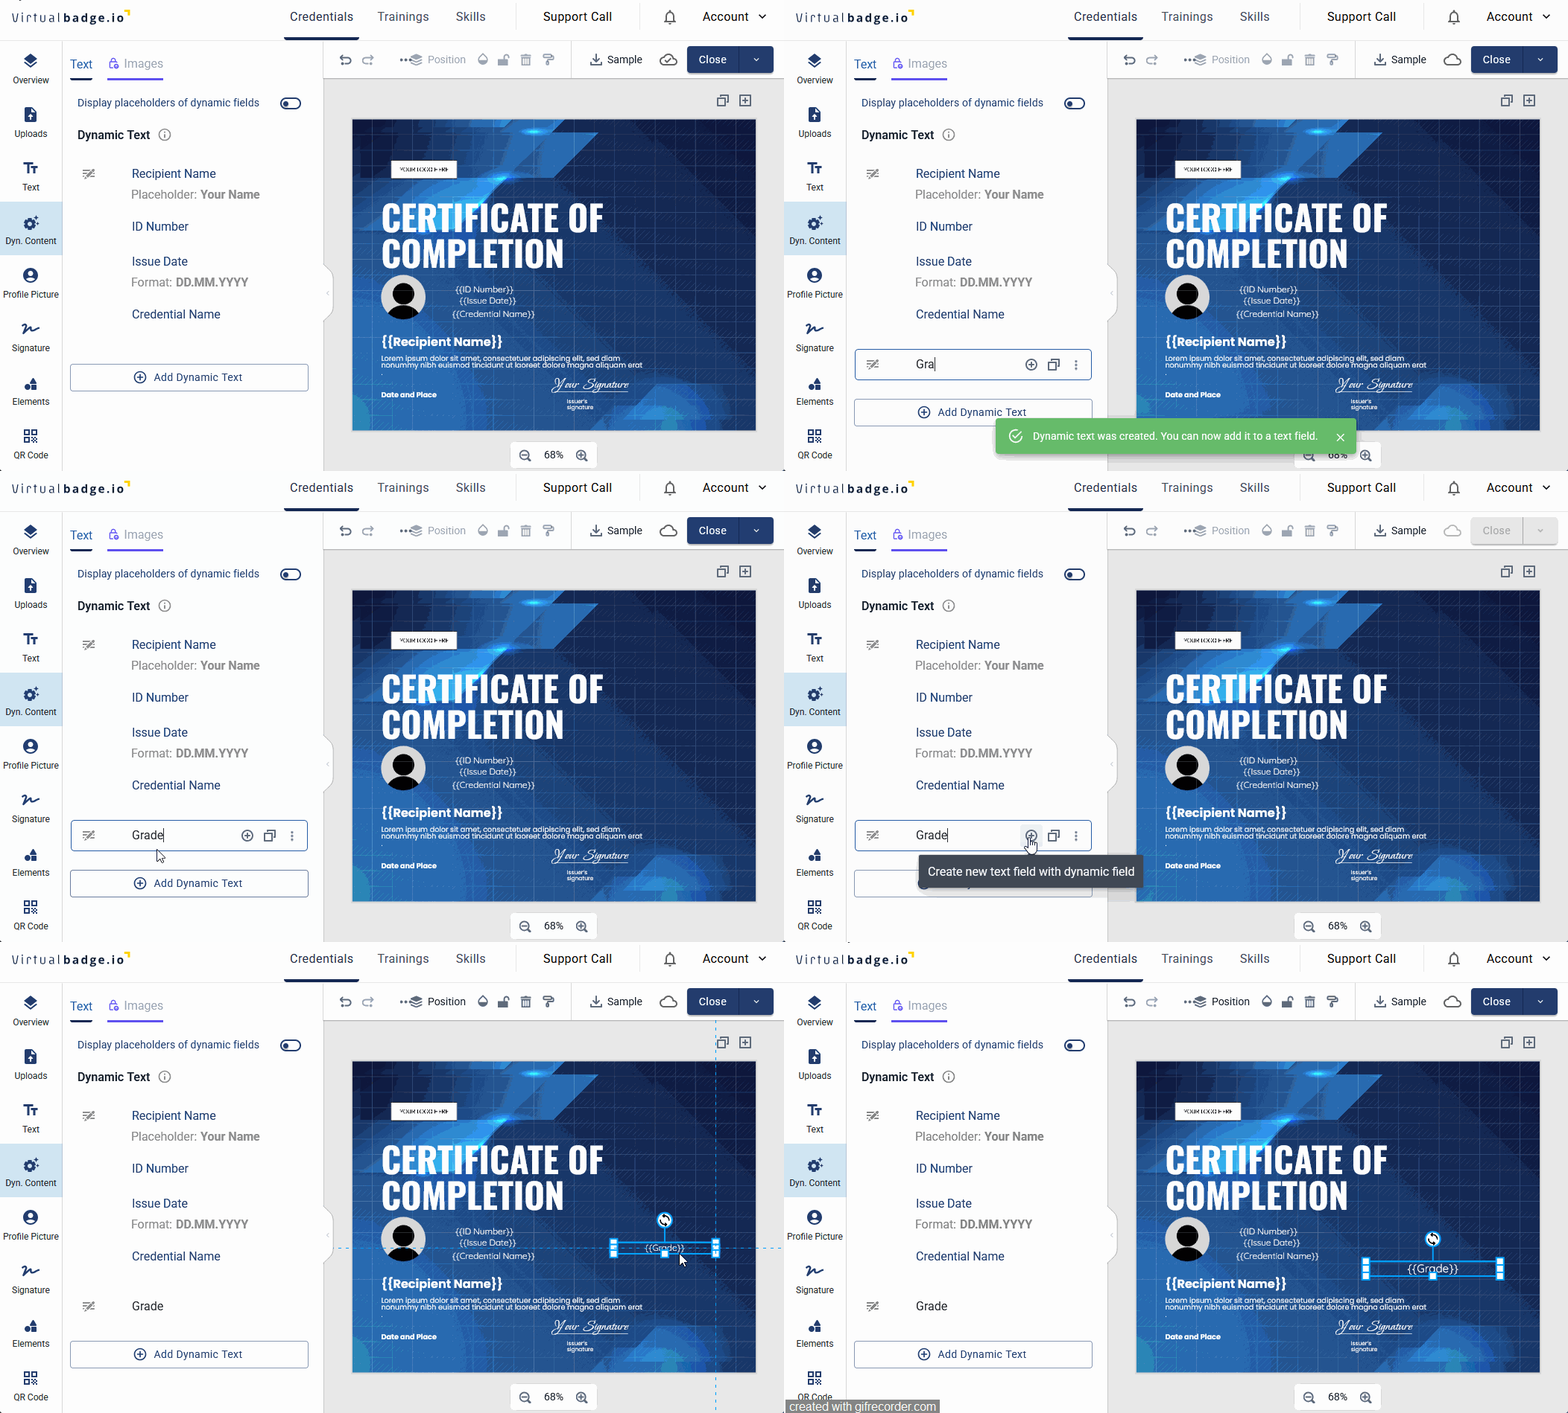
To create a custom dynamic field, click Add Dynamic Text. A new entry appears in the list, and you can rename it. In this example, we name the field Grade.
The name you give the field is also its identifier when you map columns from your CSV file or external integrations.
After renaming the field, click the + icon next to it to place it on your certificate.
Custom dynamic text fields aren’t included in every subscription.
Text Behaviour in Dynamic Fields
When the text in a dynamic field is longer than expected (for example, a very long recipient name), the field either shrinks or wraps the text.
Shrinks: The font size gets smaller step by step until the text fits on one line. This happens only when the text field contains a single pre-defined dynamic field on its own, with no other text or fields next to it.
Wraps: The text moves onto a new line, and the field grows to make room. This happens in every other case:
- When you add fixed text next to a dynamic field
- When you place two or more dynamic fields together in one text field
- When you use a custom dynamic field — custom fields always wrap, they never shrink
Quick reference
- One pre-defined dynamic field, alone in its text field → text shrinks to fit
- Anything else → text wraps onto new lines
- Custom dynamic fields → always wrap, never shrink
What this means for combined fields
A text field can contain both a pre-defined field and a custom field at the same time — for example, the recipient name followed by a module name. As soon as you combine fields like this, or add any fixed text, the field will wrap. Having a pre-defined field in the mix doesn't bring back the shrinking behaviour.
If you want a field like the recipient name to shrink, keep it alone in its own text field.
Why a name sometimes wraps instead of shrinking
You may notice that a long recipient name wraps onto two lines even though it could have shrunk to stay on one. This is expected behaviour.
The field fills the space it's given. If the field is tall enough to hold a second line, the text wraps first — and only shrinks if there's still no room. So a tall field favours wrapping, while a short field favours shrinking.
Tip: If you want the recipient's name to stay on one line and shrink instead of wrap, make the text field only as tall as one line. If you want it to wrap, give it more height.
Tips for narrow templates and long names
- Test your template with a very long name, not just a short one — this shows you the worst case before publishing
- Keep the recipient's name in its own text field so it can shrink
- Keep the field height tight if you want a single line, taller if two lines are acceptable
- The text shrinks down to a minimum size before it wraps — on narrow templates, a very long name may become quite small, so check that it still looks good
A note on the preview
The live preview in the Designer and the final certificate are created in slightly different ways. In most cases, they look identical. With very long values in a tight space, there can be a small difference between the preview and the finished certificate.
Tip: Before sending certificates to a large group, generate one test certificate with a long name and check that it looks the way you expect.
How to add placeholder texts
Placeholder texts change what your recipients see on the certificate preview images. In the editor, dynamic texts appear between curly brackets, such as and .
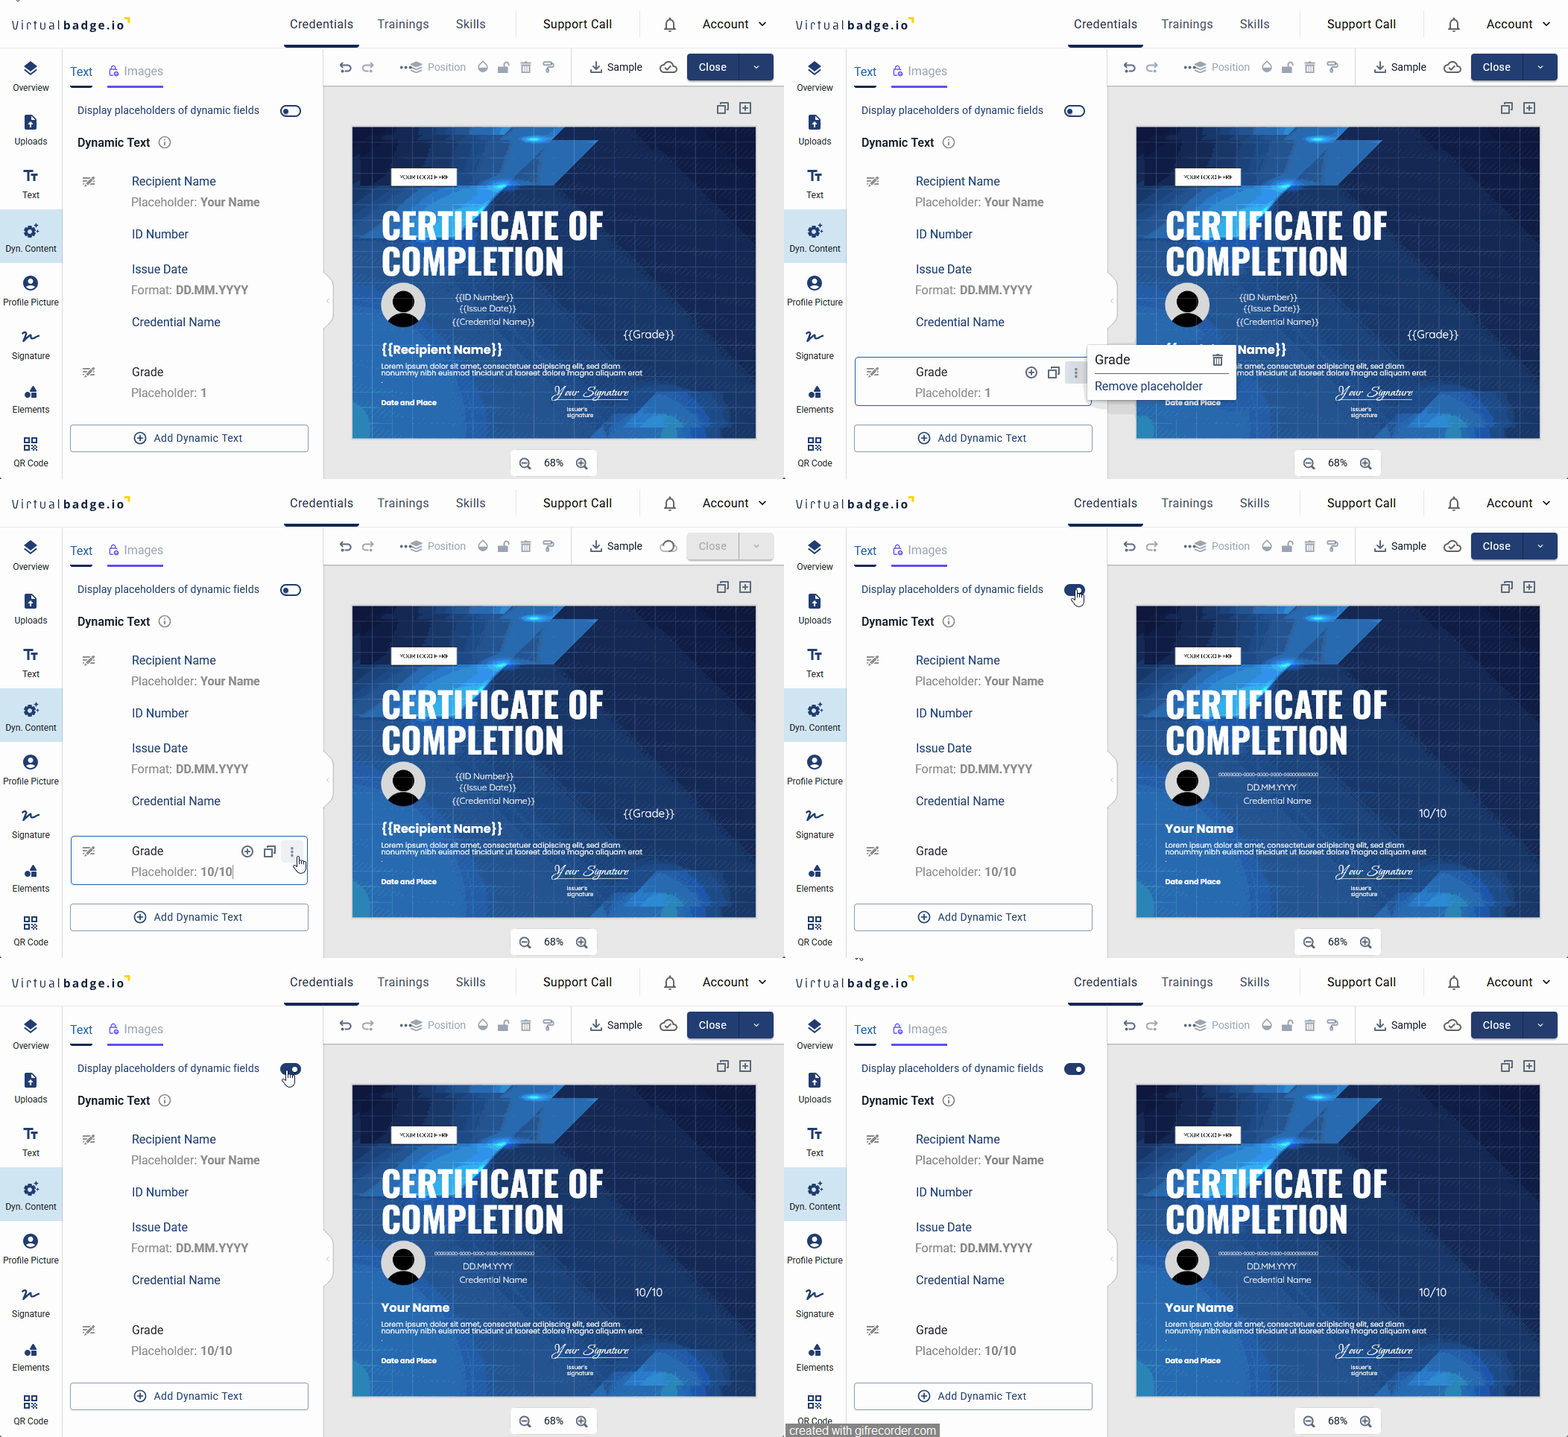
To change the placeholder text of a dynamic field, hover over the field and click the three vertical dots. Placeholder texts aren’t available for all pre-defined dynamic fields.
To view your certificate with the placeholders, just enable the toggle on the left side menu:
You can also combine dynamic fields with fixed text in one paragraph. See In-Line Dynamic Text
How to map information to Dynamic Text Fields?
Now that you have added Dynamic Texts to the design of your certificate, you must map the information that will be displayed in those fields for each one of your recipients.
You can prepare the CSV file with your recipient information and add one extra column for each dynamic field of your certificate: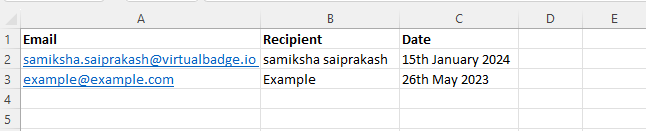
Now upload the CSV file to the Recipients tab. Other alternatives: You can manually add each recipient or use Zapier or our API to automate this workflow.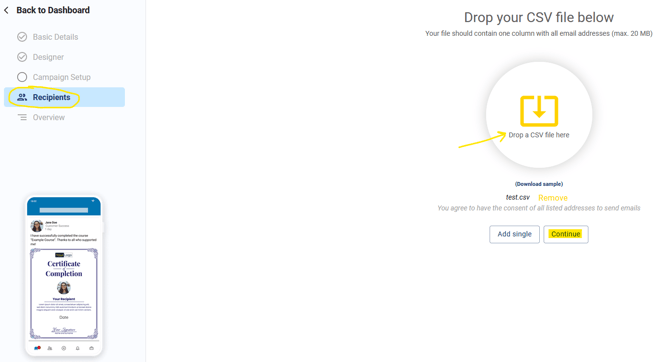
Map each column in the CSV file to the matching field on your certificate. The field names are the names you gave the custom dynamic fields in the Designer.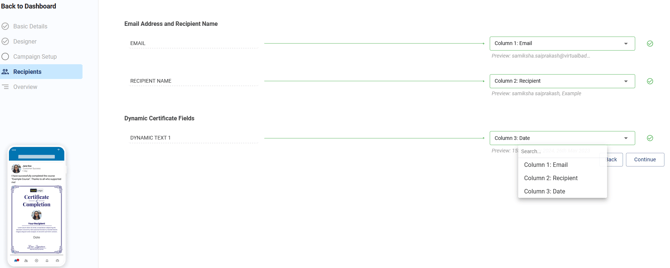
And that is it! Now you can proceed with sending your digital certificates. Each person will receive a link to claim their certificate via email.
Deleting dynamic fields
Once recipients have been added to a certificate, dynamic fields can’t be added or removed. To make changes, delete the recipients first.
To delete a dynamic field, open the Designer and go to the Dyn. Content tab. Click the three dots next to the field and select the trash icon.
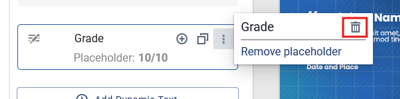
Once deleted, the field is no longer requested when you add recipients one by one, via CSV or via the API.