How to Manually Add Recipients to a Certificate/ Badge
Adding recipients to your certificate or badge is the final step before sending out the certificates.
Manually adding recipients means you can add each participant individually, directly from the "Recipients" tab.
You will always be prompted to provide the following information:
-
Recipient's name
-
Recipient's email address
-
Dynamic custom field information for this recipient (learn more about custom fields here).

Adding Recipients Using a CSV File
On the "Recipients" tab, you can also add participants using a CSV file. Just make sure that the CSV file you create includes a column for recipient names, one for their email addresses, and one for each dynamic custom field you want to add to the certificate.
Please note: You can upload a maximum of 1,000 recipients at a time.
To make this easier, we recommend downloading the sample template. This template includes all the required fields for the corresponding certificate.

For New Certificates
If you’ve started with a new (draft) certificate, you can simply drag and drop your CSV file into the software.
For Existing Certificates
If you already have an active certificate and just want to upload a list of additional participants, you can do this directly from the "Recipients" tab. Select the "Add Recipients" button and then click "Add List".


Important: Adding recipients to active/existing certificates does not automatically trigger the sending of emails. You will notice that the email status for the new recipients is marked as "not sent", and you will need to send these emails manually by clicking the "Send All Emails" button.
Adding Recipients Using Integrations
Using integrations can be helpful if you want to automatically generate and send certificates when an action is triggered in another application.
For example, when a recipient completes a course in your LMS, they will automatically receive their certificate from you.
We’ve created separate help documents for adding recipients via integrations:
1. Adding Recipients with Zapier:
With Zapier, you can connect your Virtualbadge.io account to over 4,000 other applications. You can create a free Zapier account and set up integrations without writing any code.
2. Adding Recipients via Our API:
The API provides integration options that allow you to further customize the process of creating and sending certificates.
Now let's understand how Dynamic fields work:
Adding Dynamic Text Fields for Recipient Names in the Designer
In the Designer, there are two ways to add dynamic text fields for recipient names:
Using the predefined recipient name field:
-
Go to the Dyn. Content tab and select the predefined Dynamic Text.
-
Choose the default field, Recipient Name.
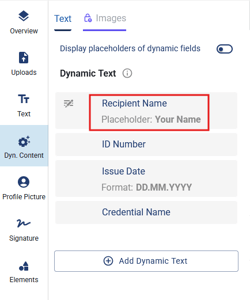
Note: This field automatically reduces the font size if the name reaches the edge of the certificate, preventing it from wrapping to a second line.
Or create a new custom dynamic text field:
-
Click on "Add Dynamic Text."
Let's say, for example, you want to collect the first and last name separately, you can use this option.
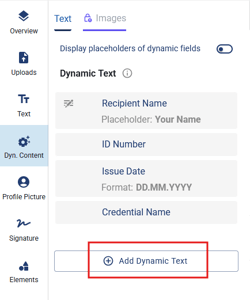
Note: This option is useful if you want to prevent the name from overflowing into the certificate design.
With these methods, you can ensure the recipient's name is displayed correctly on the certificate.
If you are using an Apple device to upload recipients, the "Sample CSV" file may open by default in Numbers. After entering your recipient data and saving the file as a CSV, ensure that you do not select the option to "Include table names". Otherwise, you may encounter an error notification when uploading the CSV.